Learn how to manage your attendees on the Arena platform.
Arena’s built-in registration platform allows you to create custom Ticket Types, add custom fields and more. It also allows you to manually add attendees in bulk if you wish to use another registration platform.
Here, we’ll teach you how to tailor the attendee registration process to your needs and how to manage all the attendees that register for your event.
How to access the ‘Manage Attendees’ page
The ‘Manage Attendees’ page contains all the tools you need to view the status of your attendees, manage registration and edit their information if needed.
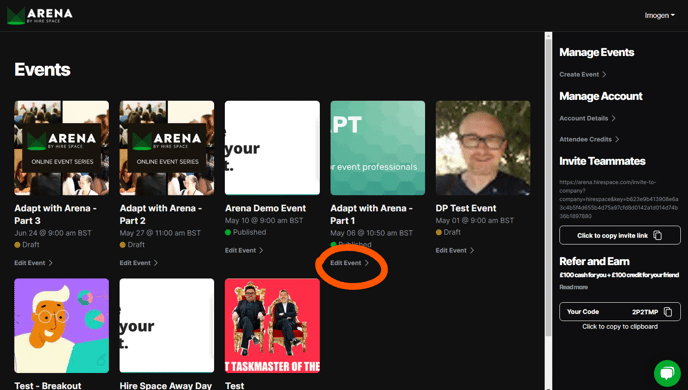
To access the ‘Manage Attendees’ page for your event, start on your account’s central dashboard. Here, you’ll need to click on the ‘Edit Event’ button beneath the event whose attendees you wish to manage.
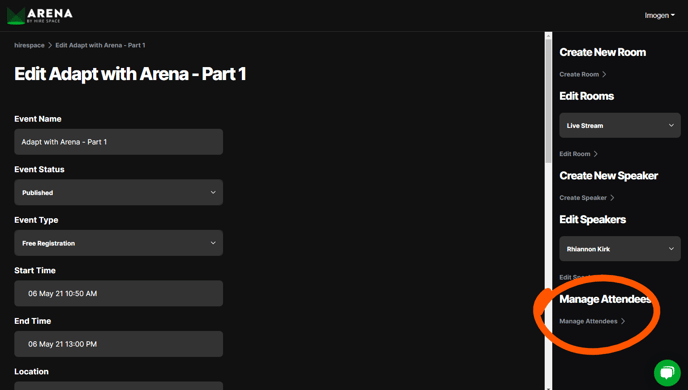
On the ‘Edit Event’ page, you’ll see a section named ‘Manage Attendees’ down the right-hand side. Click the button to access the ‘Manage Attendees’ page.
Event type
Before you do anything else, make sure that you’ve selected the right event type for your event. Your event type determines whether your event is public or private, and who can access it.
Your chosen event type (and what it means) will be displayed at the top of the ‘Manage Attendees’ page as follows:
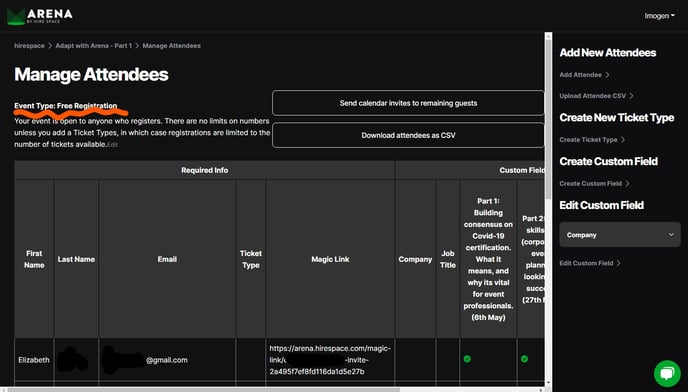
You can change it by clicking on the ‘Edit’ button next to the event type description shown above. Alternatively, your event type can be edited at any time from the ‘Edit Event’ page.
To find out more about event types and how to use them, read our guide to event types on Arena.
Attendee status
On the ‘Manage Attendees’ page, you’ll see a table listing all the attendees who have been invited to your event or who have registered to attend.
One of the fields you’ll be able to view for each attendee is their registration status. This will be visible under three headings found at the far right of the table, labelled ‘Reg,’ ‘Inv’ and ‘Att.’
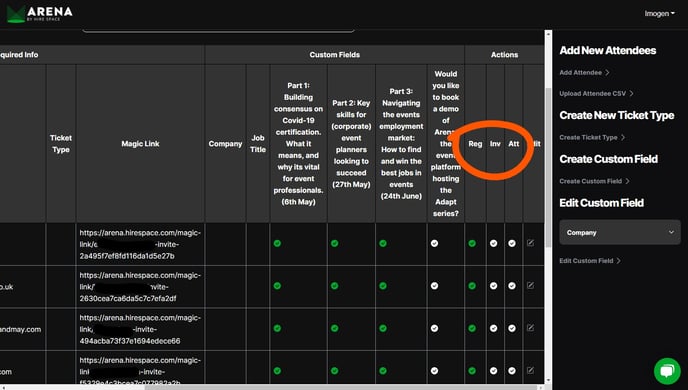
Here’s what these fields tell you:
| Field | Notes |
| Reg (Registered) | This means that your attendee has registered via the registration page. This is most useful for Private Events where you want to tell the difference between those who are just ‘on the invite list’ and those who have responded to an invitation and completed registration. You can also set this field manually. |
| Inv (Invited) | This indicates whether the attendee has been sent a calendar invitation. Read our guide on how to send attendees calendar invites using the Arena platform for more information. |
| Att (Attended) | This shows whether the attendee has attended your event, so it will remain blank until the event day itself. For single-day events, it will show you how many Attendee Days you have used and therefore how much you will be charged. For multi-day events where individual attendees may have attended more than one day, your charge may be higher than the number of attendees with a green tick in this column (read our guide to Arena costs for more details). |
Ticket Types
Ticket Types allow you to limit the number of registrations to your event. This is especially useful for events that have ‘Free Registration’ as the event type, as these events will otherwise have no limits on numbers.
They also allow you to show or hide Sessions and Rooms for specific types of attendees.
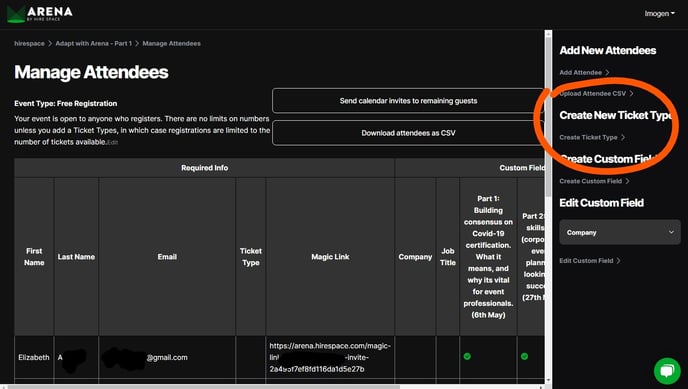
To create a Ticket Type, simply click on the ‘Create Ticket Type’ button on the right-hand side of the ‘Manage Attendees’ page.
Here, you'll be able to enter a quantity for your Ticket Type, in order to limit the number of registrations.
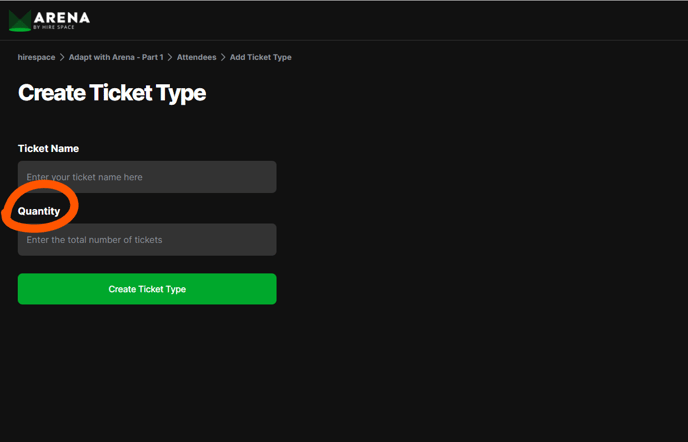
The ‘Sold’ field will be updated automatically when someone registers for your Ticket Type. You can also update this manually if you don't want to start on 0 sales (😉). When the number of tickets sold reaches the total number of tickets, that Ticket Type will be removed from your registration page.
When you come to edit Rooms and Sessions, you can control which Ticket Types can view them using the 'Allowed Ticket Types' fields. This allows you to tailor your event to each attendees' needs and enables you to give attendees access to your event at specific times - especially useful for multi-day events or for events with morning and afternoon sessions where attendees aren’t expected to attend the whole thing. To learn more about using Ticket Types to tailor the attendee experience, read our guide to creating Ticket Types.
Paid tickets are not currently available, but are planned for summer 2021.
Custom fields
Custom fields allow you to capture additional information about your attendees when they register. You might want to use them to capture their job title, annual budget or interests so that you can personalise their experience or use the data to report back to event sponsors.
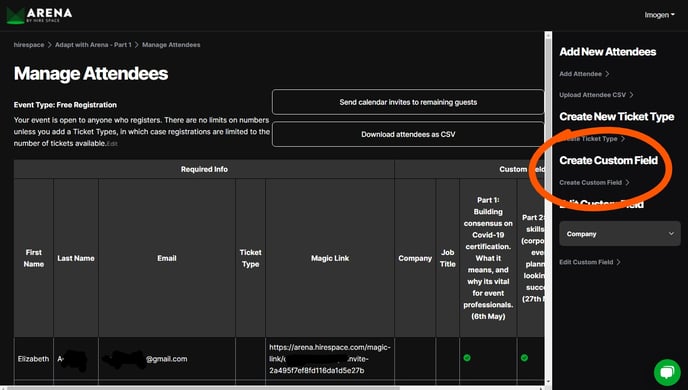
To add a custom field, start by clicking the ‘Create Custom Field’ button on the right-hand side of the ‘Manage Attendees’ page.
Here, you’ll be able to customise your field.
For instance, you can decide whether you’d like attendees to fill the field out in plain text (labelled ‘Text’) or by ticking a yes/no checkbox (labelled ‘True / False’). To do this, simply select your preference from the drop-down menu under the ‘Field Type’ section.
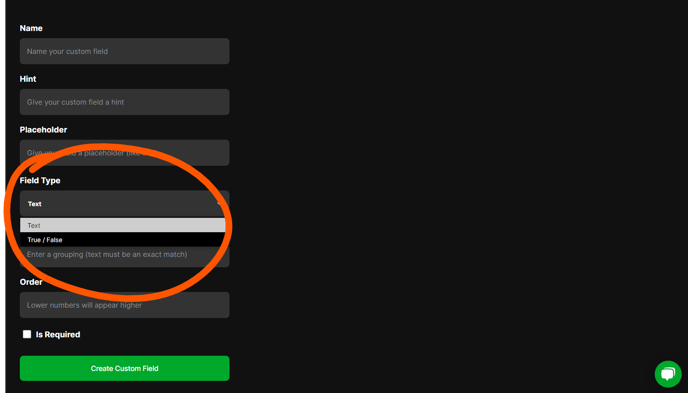
You can also define a field grouping for your custom fields by typing a name into the ‘Field Grouping’ box.
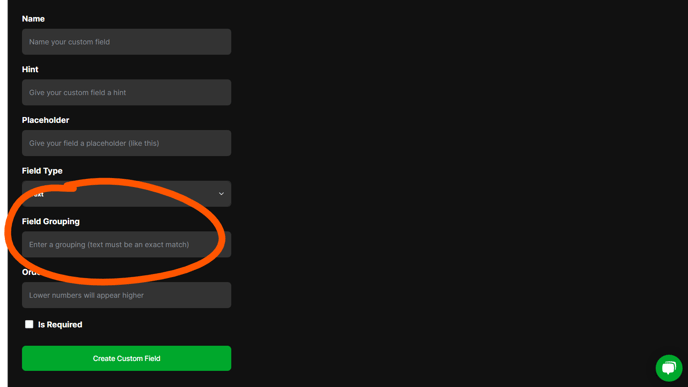
If what you type is an exact match for another field then the fields will be grouped together under that header on your registration form.
You can set up an unlimited number of custom fields and they will all appear on your registration page.
As you can see, no matter whether you use our in-built registration platform or whether you add your attendees from another registration platform, managing your attendees is easy on Arena. Next, learn all about the attendee registration experience for your users.
