
Your guide to tailoring the attendee experience with Ticket Types.
Before publishing your event, you can decide whether you’d like to offer different Ticket Types for attendees to choose from. Creating Ticket Types is a great way to tailor the attendee experience (for example, allowing you to show or hide content sessions and breakout rooms to different groups). It also allows you to limit the number of attendees registering for your event if you’d like to.
First, let’s take a look at how to create a new Ticket Type.
How to create a new Ticket Type
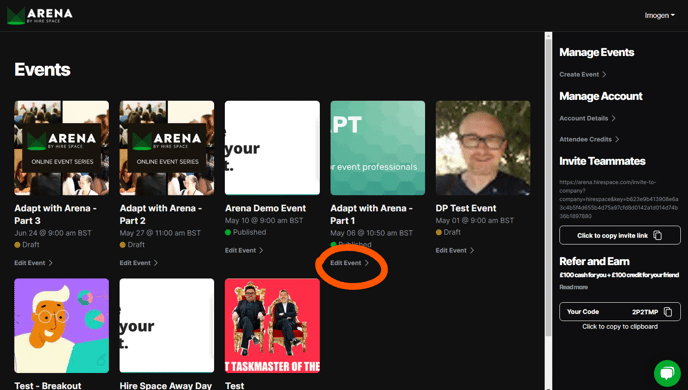
To create a new Ticket Type, you’ll need to head over to your event’s ‘Manage Attendees’ page. To get there, simply click ‘Edit Event’ under the event you’d like to edit on your central account dashboard.
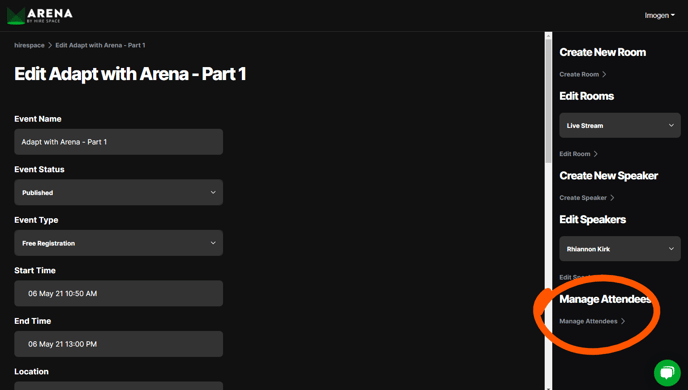
Then, click ‘Manage Attendees’ in the bottom right of the ‘Edit Event’ page.
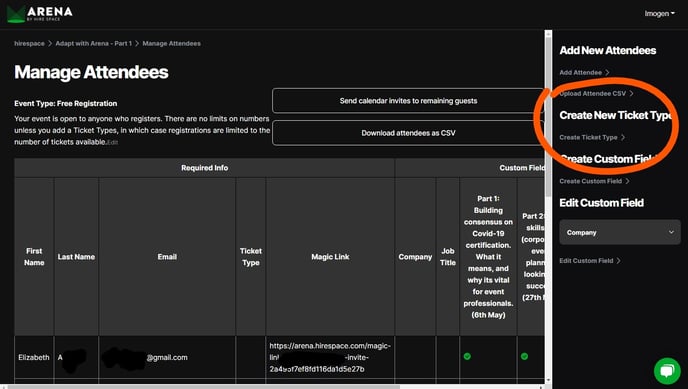
Now you can simply add a new Ticket Type by clicking the ‘Create Ticket Type’ button on the right-hand side of your screen.
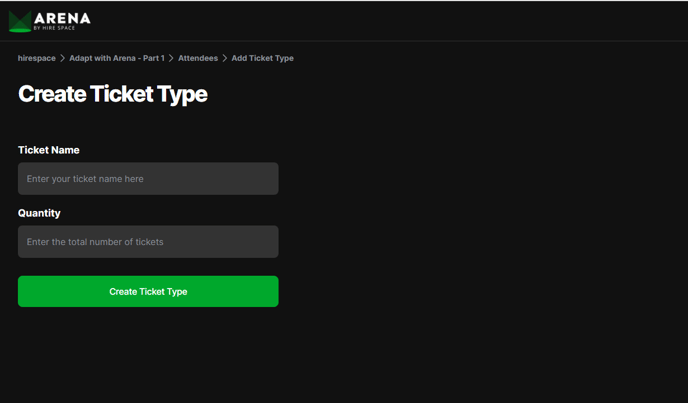
Here, you’ll be able to give your Ticket Type a name and you’ll be able to select how many of this type of ticket you’d like to make available.
Limiting registrations using Ticket Types
Using the ‘quantity’ box shown above to restrict the availability of certain Ticket Types is a great way to limit registrations, especially if you’ve selected ‘Free Registration’ as your event type, which will allow anyone to register.
When somebody selects your Ticket Type at registration, the ‘sold’ field will be updated automatically (in fact, you can also update it manually if you’d rather not start on 0 sales!). Then, once the number of tickets sold reaches the total number of tickets you selected, that Ticket Type will be removed from your registration page.
Showing Rooms and Sessions using Ticket Types
Ticket Types can also be used to show or hide Rooms or Sessions for individual groups of attendees, in order to tailor their experience even more.
To do this, you’ll need to head over to individual ‘Edit Room’ and ‘Edit Session’ pages to utilise the ‘Allowed Ticket Types’ field.
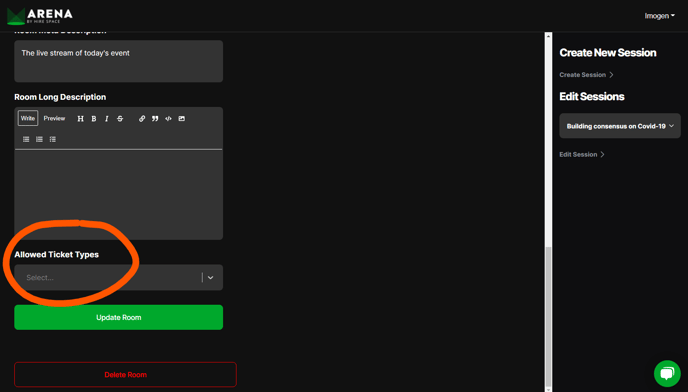
Using this field, you can select which Ticket Types you’d like to permit entry to. Read our guides on creating a Room or creating a Session for help editing these pages.
If an attendee doesn't have a Ticket Type or is an organiser for the event, they will be able to see all Rooms and Sessions.
Similarly, if you don't select any Ticket Types as ‘Allowed Ticket Types’ for any Rooms or Sessions then everyone will be able to see every Room or Session.
However, once you select one Ticket Type as an ‘Allowed Ticket Type’ for a Room, then only attendees with that Ticket Type will be able to see that Room or Session, and attendees will only be able to see other rooms if their Ticket Type matches the ‘Allowed Ticket Type’ for that Room or Session.
Using the ‘Allowed Ticket Types’ feature is also a great way to give attendees access to your event at different times, for example, if you’re holding a multi-day event or an event that has morning and afternoon sessions. By adding a Start Time and an End Time to your Ticket Type, attendees can choose which part of your event they’d like to attend during your event registration.
Paid tickets are not currently available, but are planned for summer 2021.
Ticket Types can be a valuable tool for all sorts of reasons, from giving attendees access to different parts of an event to limiting numbers. To learn about more ways to manage your attendees, head over to our dedicated guide.