Here, we’ll show you how to add Sessions to your Rooms.
Once you’ve created a Room for your event, you’ll be able to add Sessions. Sessions are timetabled blocks that tell your audience what content they can expect when they enter a Room and at what time. They’ll appear on your event schedule:
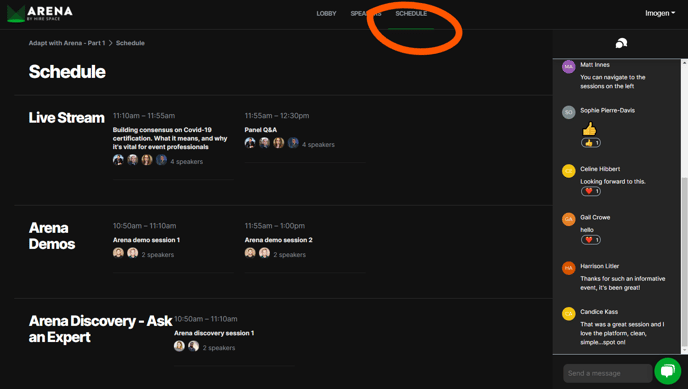
And they’ll also appear in the room tiles on the left-hand side of your event lobby:
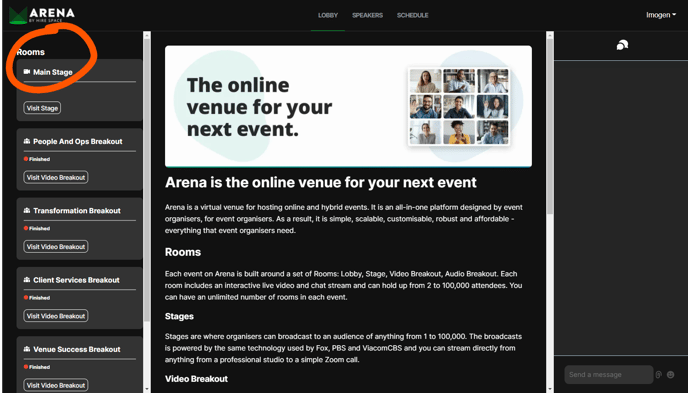
So, how do you set one up?
How to add a Session
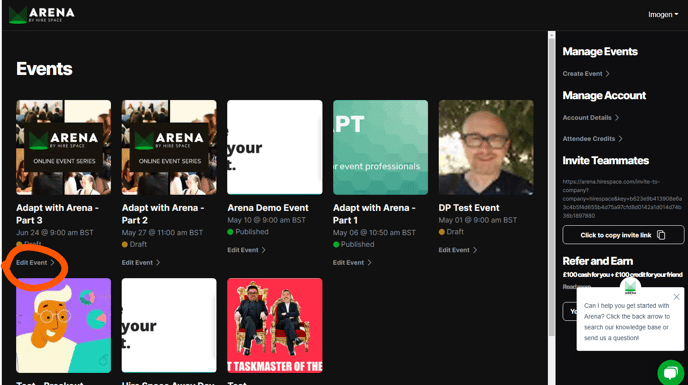
To create a Session, simply navigate to the ‘Edit Room’ page of a Room that you have completed previously. You can do this by clicking the ‘Edit Event’ button beneath the event you’re setting up on your central dashboard.
Then, click ‘Edit Room’ in the control panel on the right-hand side.
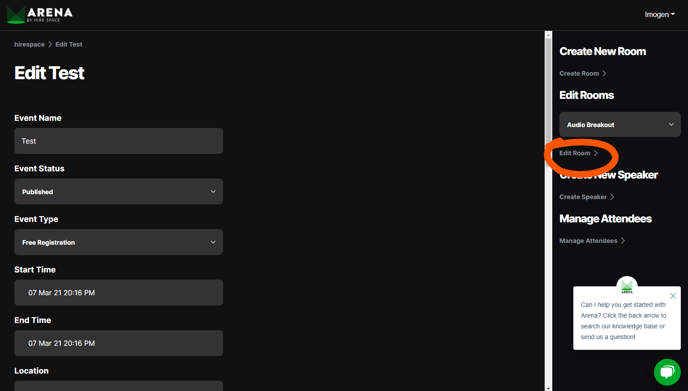
Now you’re on the ‘Edit Room’ page, you can add a session by simply clicking on the ‘Create Session’ button in the control panel on the right of your screen.
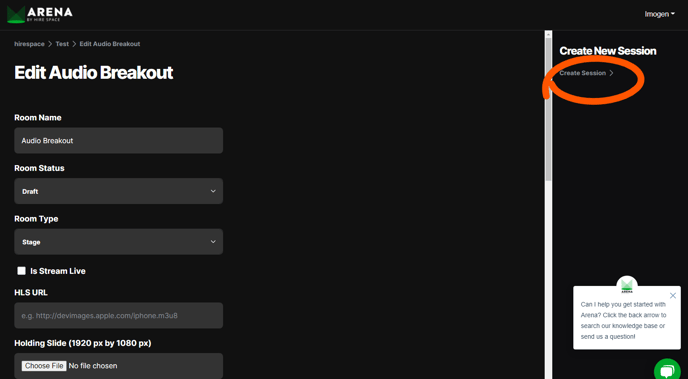
This will take you to a simple form where you can fill out the following fields:
| Field | Notes |
| Session Title | This is how your session will show in the schedule. It will also provide the URL for session pages (due summer 2021). This URL cannot be changed so it’s important to get it right the first time. |
| Start Time | This is when the session starts. It is used to populate the schedule and also controls the live room tile information in the event lobby. |
| End Time | This is when the session ends. It must be after the start time. |
| Materials | You can upload any number of materials such as PDFs etc. here. They will be available for your attendees to download from the schedule. |
| Meta Description | This field is planned to show in future layouts of Arena. |
| Long Description | This field is planned to show in future layouts of Arena on Session pages (due summer 2021). It uses markdown. |
Once you’ve filled out these fields, just click the big ‘Create Session’ button at the bottom of the page.
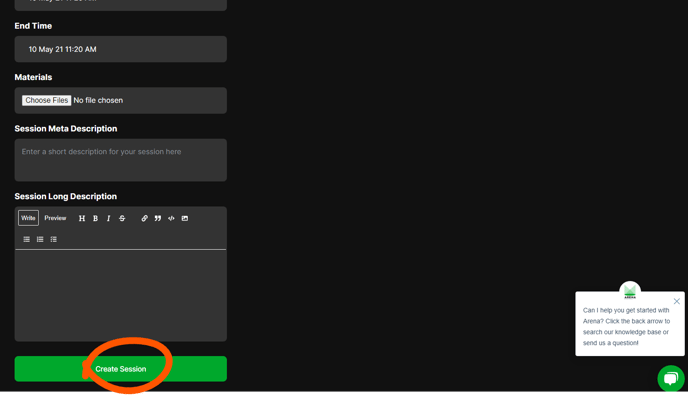
Voila! You’ve created your first Session!
Next, you may want to customise your event further by adding speakers. Find out how in our dedicated guide.
